If you didn’t know already, iDt has built in leave management in both our software options – ADI Time and biotime.
This article is to help you get the most out of your system, and give you a few tips and tricks on how to successfully navigate through it.
If you have not been using the leave management function in your system already, you may need to get it configured first – so that the export file that goes into your payroll system is set up correctly with your leave information. It’s important that the hierarchy and department settings are correct. Please feel free to call or email our support team on NZ 0800 111 438 AU 1300 139 460 or support@idtgroup.com.
We’ll start with biotime. There are a few ways you can get in to the leave management area – this is called ‘Time Off’. You can get there from the homepage:
If you don’t have the Time Off tile on your biotime homepage, you can add it on the header bar.
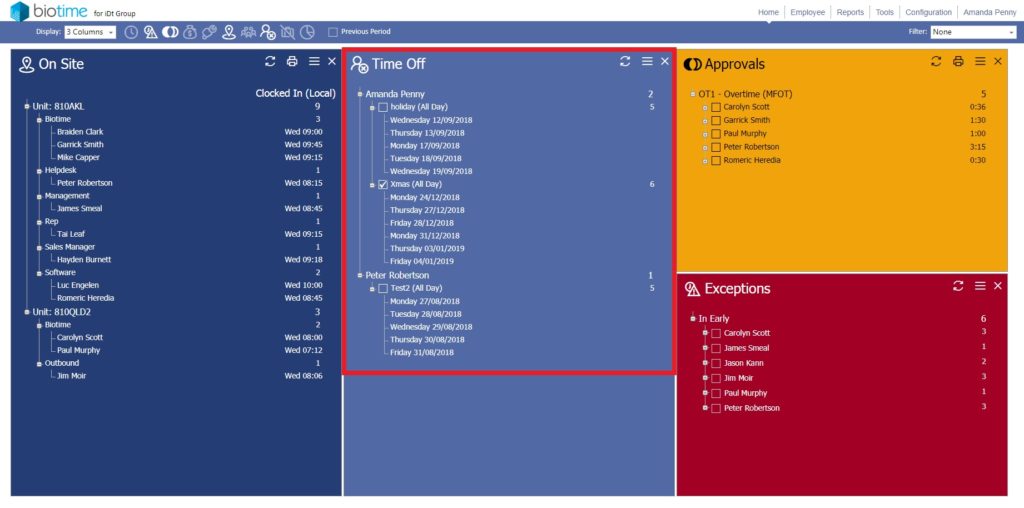
As a supervisor you would see all of your staff leave requests on this tile. You can simply click on them and approve/decline or edit.
Another way to get to Time Off is through the timesheet. You can click on any name on the on site tile, or through the top right nav.
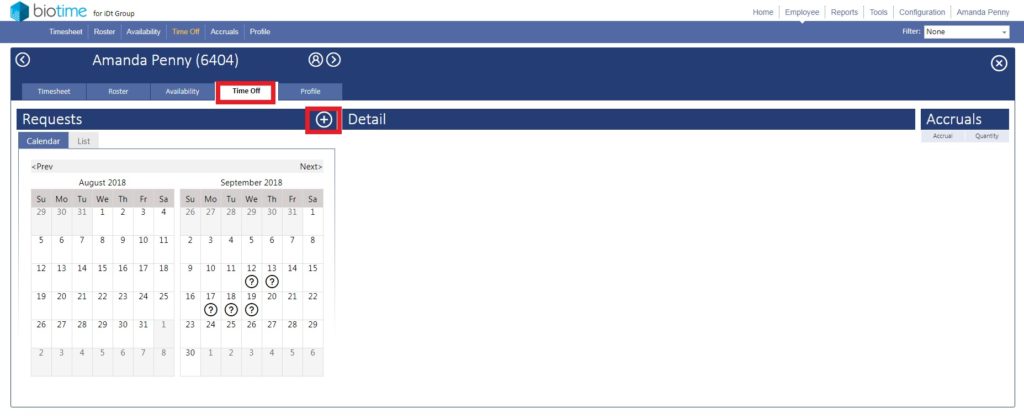
Click on the Time Off tab and then you can see on the calendar tab any leave requests. You can add leave with the + button, but employees can do this themselves either on PC or the mobile app. I will be posting details for the Mobile App shortly and will add a link here when it’s finished.
As a supervisor you can approve requests simply by clicking on the ? and the tick on the right hand side.
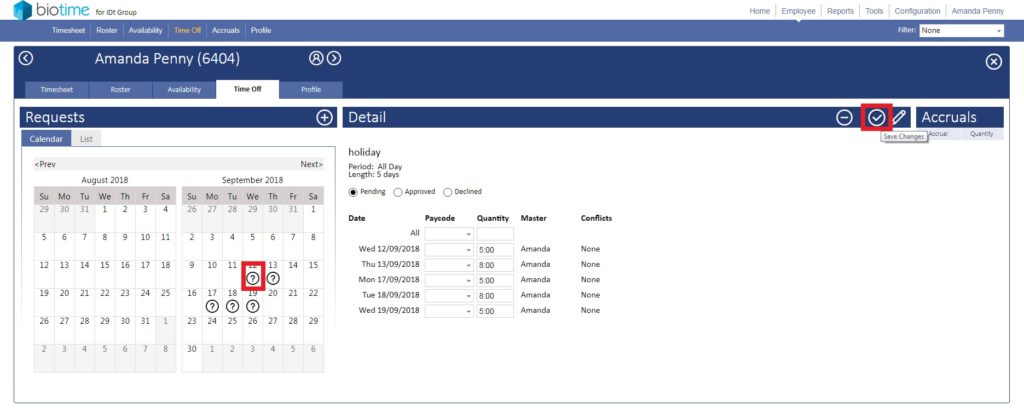
If you have more than one leave request for the same period, it will show a conflict.
This information will then be taken across to payroll, and depending on how your company or the payroll likes to receive this information, we can push across leave in days, or hours.
Tips and tricks:
Public Holidays
Your configuration should be set up with the correct country/regional public holidays and the rate of overtime and days in lieu – unless your organisation rewards more than required then this will need to be set up in the config.
Department Configuration
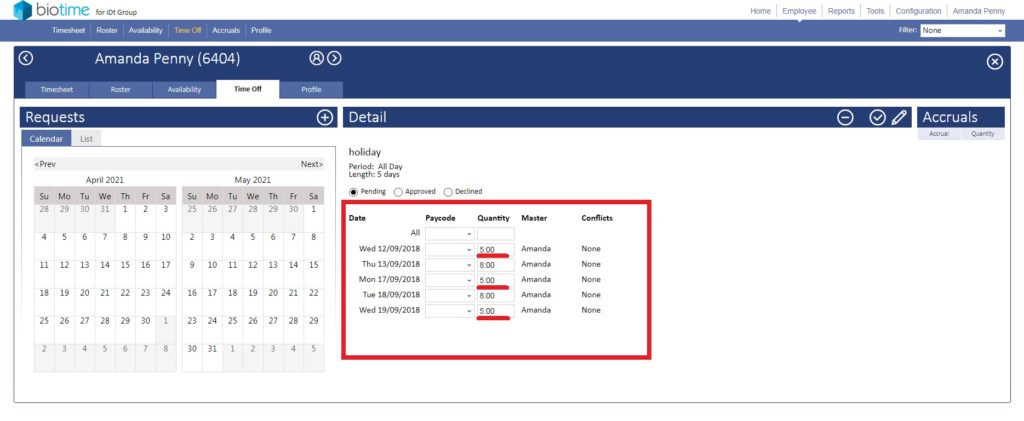
If your employee is set up under a department that awards full time leave (like I am here below), then it will add your hours leave as 8 or 7.5 etc. But because my roster is actually set up as Mon/Wed/Friday, 5 hours per day – that is why the hours shown in my leave differ. You would need to change the department I belong to, in order for this to be correct – or you can change the hours manually, (this is not something we would recommend).
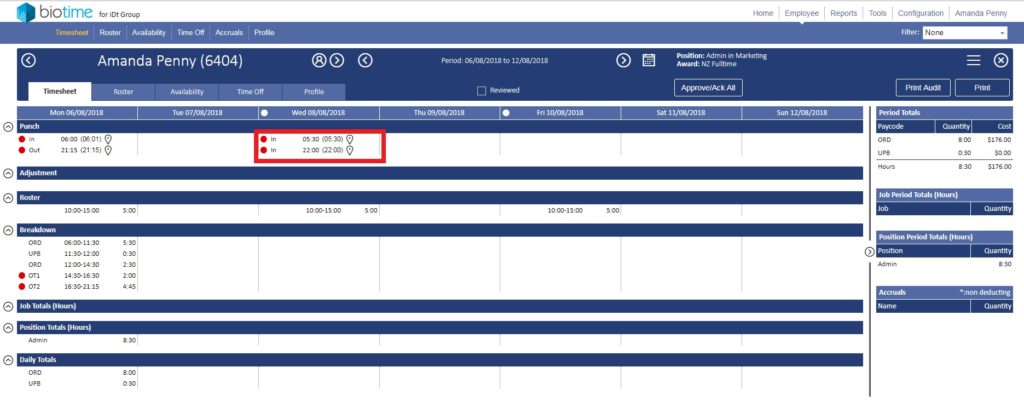
Two “in” Punches
If employees are working long hours over a busy period, you may see 2 in punches, and no calculation of hours – this is because the staff have worked in excess of their “maximum” hours in one day, which is configurable in their Award Group (and would have been set up at time of implementation).
This can be an issue for organisations that have seasonal peaks, or over the Christmas period when there is a requirement for employees to work longer hours.
Things that can affect how the employee punch is received
Award group – the group the employee is assigned to will dictate the;
Rounding
Grace period
Exceptions
I hope this helps you understand your staff leave management. Any questions, please call NZ 0800 111 438 AU 1300 139 460 or email support@idtgroup.com.